
How to Draw a Christmas Pear Tree for 2024: A Step-by-Step Guide
Related Articles: How to Draw a Christmas Pear Tree for 2024: A Step-by-Step Guide
- Spread Holiday Cheer With Enchanting Christmas Greetings Email For 2024
- Christmas Greetings And Sayings For 2024: Spread The Joy And Warmth
- Christmas Hat GIFs 2024: The Ultimate Guide To Festive Headwear
- Christmas Games: Right Left Game 2024
- Deck Your Doors With Festive Cheer: A Comprehensive Guide To Christmas House Flags 28 X 40 2024
Introduction
With great pleasure, we will explore the intriguing topic related to How to Draw a Christmas Pear Tree for 2024: A Step-by-Step Guide. Let’s weave interesting information and offer fresh perspectives to the readers.
Table of Content
Video about How to Draw a Christmas Pear Tree for 2024: A Step-by-Step Guide
How to Draw a Christmas Pear Tree for 2024: A Step-by-Step Guide

As the festive season of Christmas approaches, the iconic image of a pear tree laden with ornaments and twinkling lights evokes a sense of joy and anticipation. Capturing the essence of this holiday symbol through the art of drawing can be a rewarding and festive activity. In this comprehensive guide, we will delve into the detailed steps on how to draw a Christmas pear tree, ensuring a beautiful and memorable artwork that will add a touch of Christmas cheer to your home or holiday cards.
Materials:
- Pencils (HB, 2B, 4B)
- Eraser
- Ruler or straight edge
- Drawing paper
- Optional: Colored pencils or markers
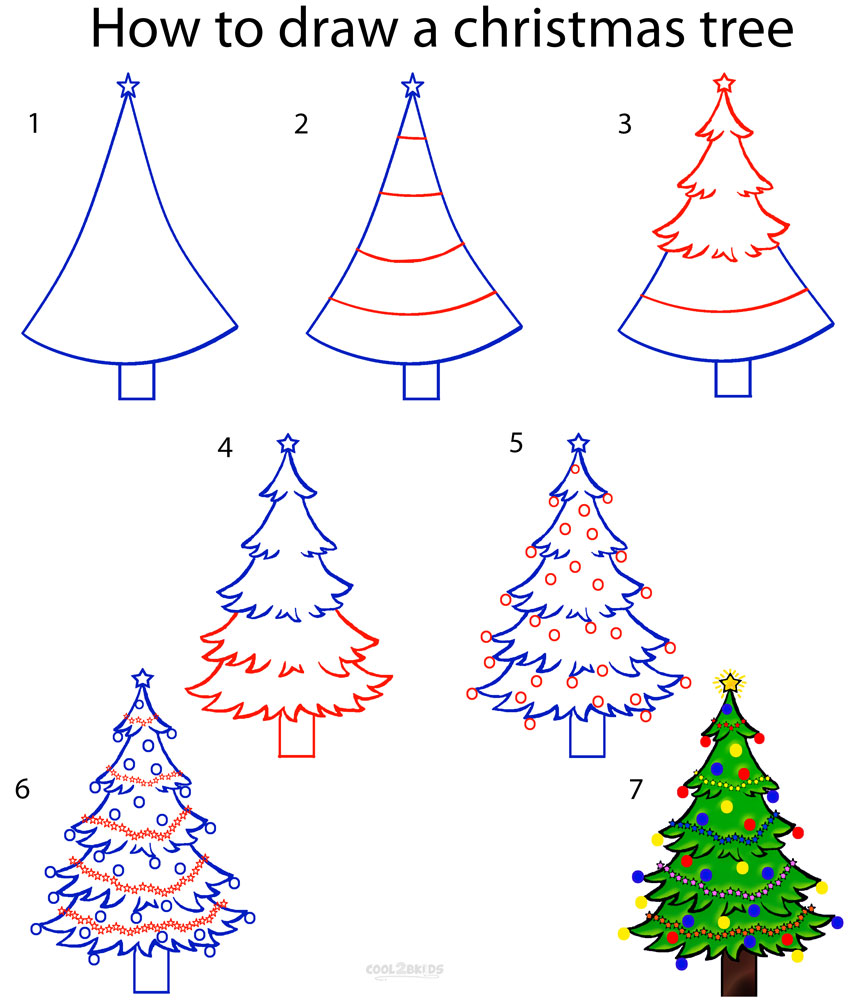
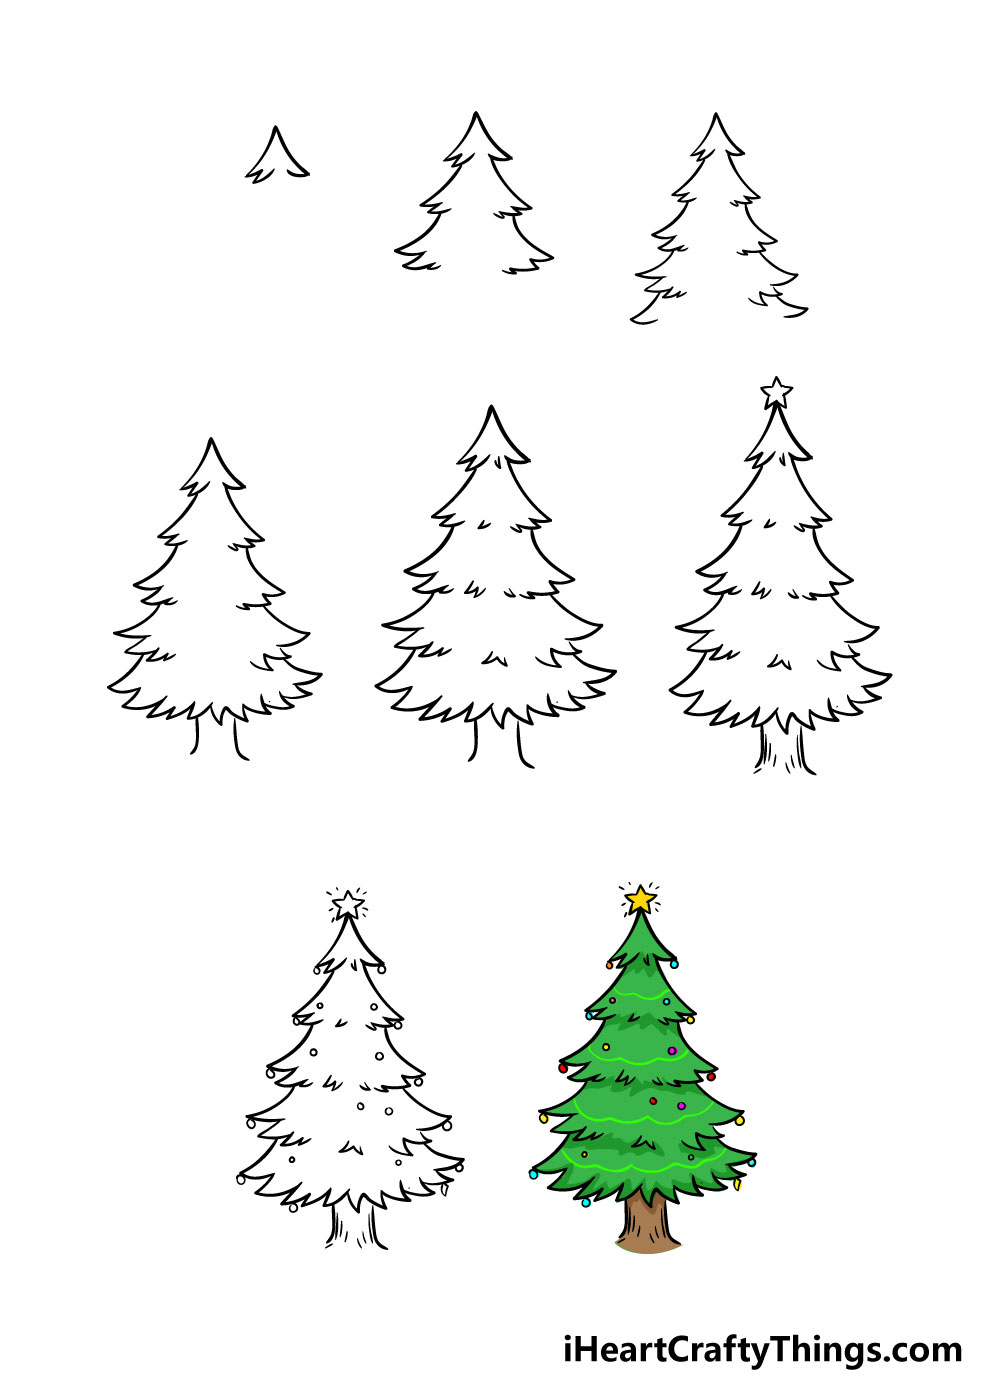
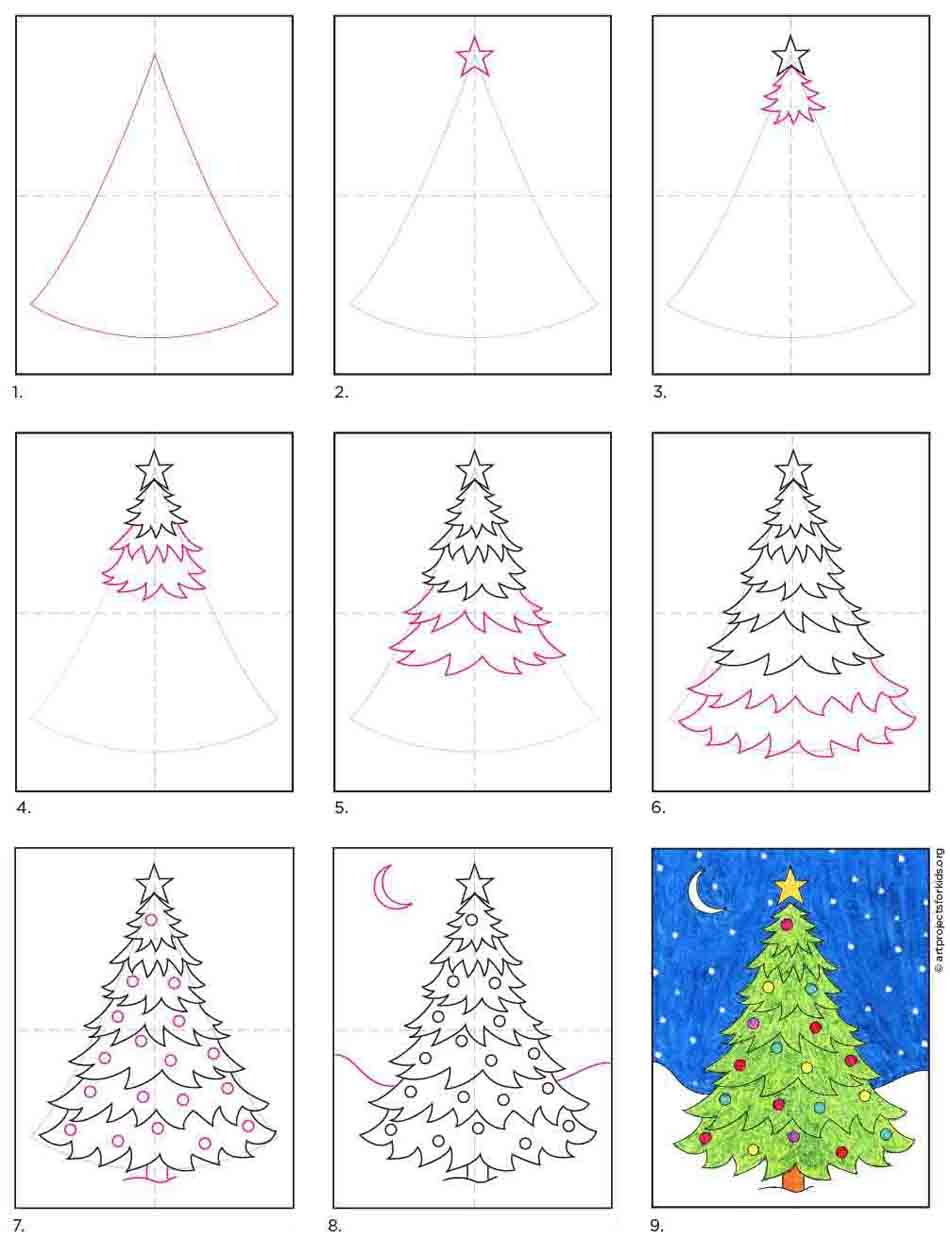
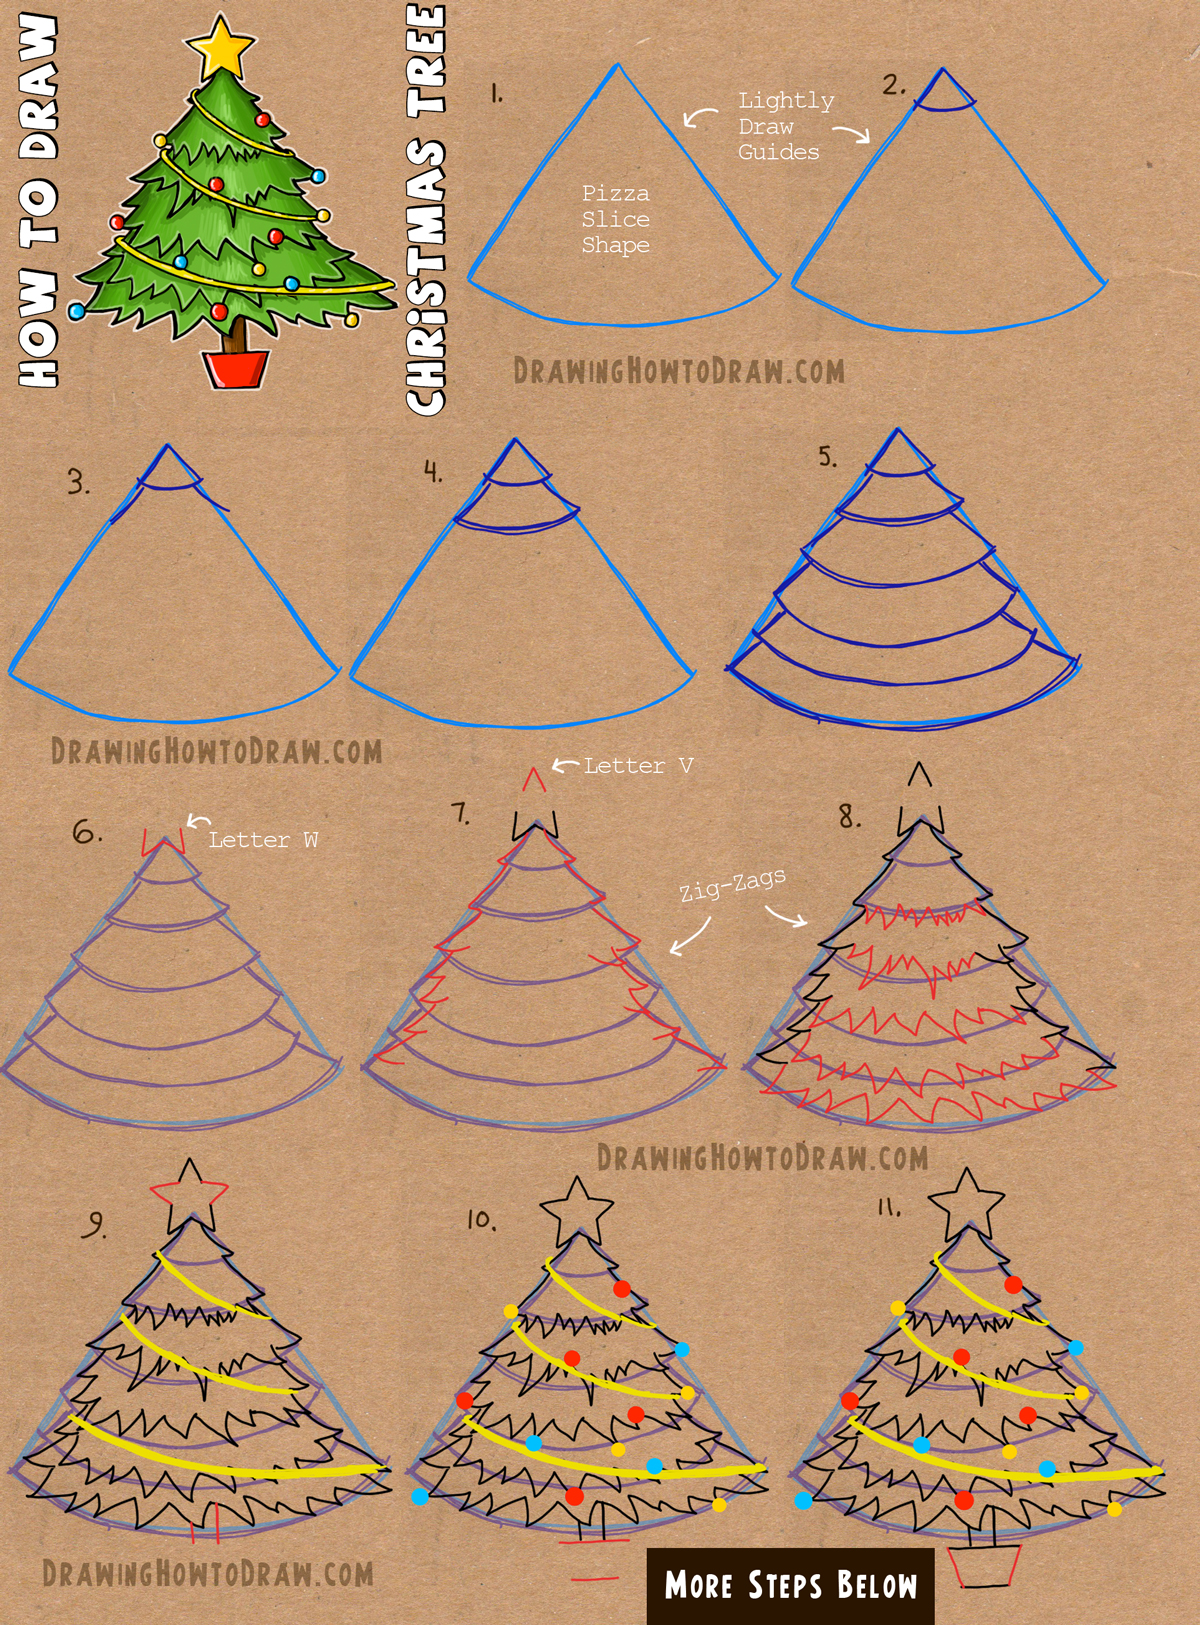
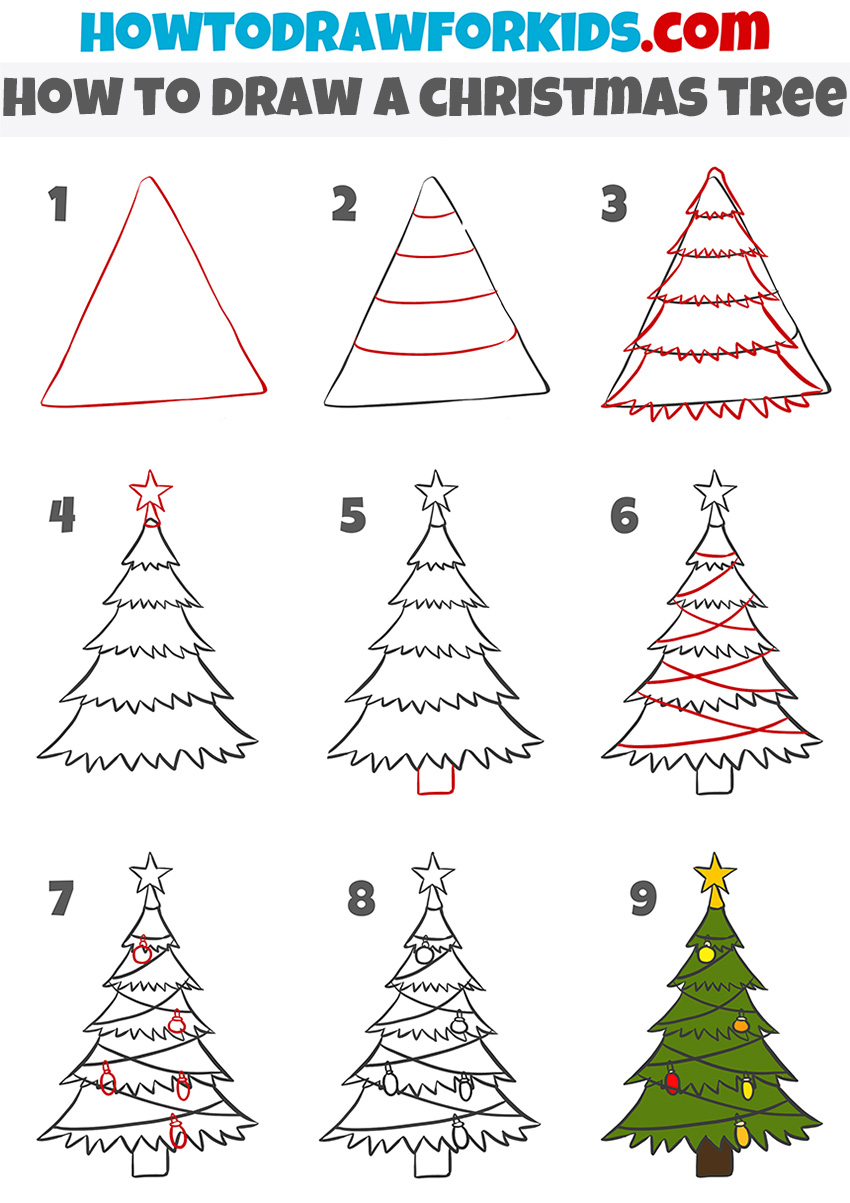
Step 1: Sketch the Basic Tree Shape
Begin by sketching a vertical line to represent the trunk of the tree. From the top of the trunk, draw two curved lines that arch outward to form the branches. The branches should be slightly asymmetrical and have a slight curvature.
Step 2: Add the Foliage
Using a combination of HB and 2B pencils, start adding the foliage to the branches. Draw small, teardrop-shaped leaves along the edges of the branches, overlapping them slightly to create a sense of volume. Vary the size and orientation of the leaves to add visual interest.
Step 3: Define the Trunk and Branches
Using a 4B pencil, outline the trunk and branches to give them more definition. Add texture to the trunk by drawing short, horizontal lines along its surface. Draw small knots and imperfections to create a more realistic effect.
Step 4: Draw the Pears
Sketch the shapes of the pears hanging from the branches. Use a combination of circles and ovals to create the basic forms. The pears should vary in size and position, adding depth to the drawing.
Step 5: Add Details to the Pears
Refine the shapes of the pears by adding highlights and shadows. Use a lighter pencil (HB or 2B) for the highlights and a darker pencil (4B) for the shadows. This will create a sense of dimension and make the pears appear more realistic.
Step 6: Draw the Ornaments
Add festive ornaments to the tree by drawing small circles, stars, and bells. Use a variety of colors and patterns to create a vibrant and eye-catching display. Position the ornaments randomly throughout the branches.
Step 7: Draw the Garland
To complete the Christmas decoration, draw a garland of lights around the tree. Use a ruler or straight edge to draw two parallel lines along the branches. Connect the lines with small, evenly spaced circles to represent the lights.
Step 8: Add the Finishing Touches
Use a soft pencil (2B or 4B) to smudge the edges of the foliage and create a softer, more blended effect. Add subtle shadows beneath the tree to ground it and give it a sense of depth.
Step 9: Color the Drawing (Optional)
If desired, add color to your Christmas pear tree using colored pencils or markers. Use bright and festive colors to enhance the holiday spirit. Experiment with different shades and textures to create a unique and personalized artwork.
Tips for Success:
- Pay attention to the proportions and perspective of the tree to ensure a realistic appearance.
- Use a variety of pencil grades to create depth and texture.
- Experiment with different leaf shapes and sizes to add visual interest.
- Add details such as knots and imperfections to the trunk for a more realistic effect.
- Position the ornaments and lights randomly to create a more dynamic composition.
- Use a ruler or straight edge to ensure straight lines for the garland.
- Smudge the edges of the foliage to create a softer, more blended effect.
Conclusion:
Congratulations on completing your Christmas pear tree drawing! This festive artwork will undoubtedly bring joy and holiday cheer to your home or holiday cards. Whether you choose to keep it as a cherished keepsake or share it with loved ones, this beautiful creation will serve as a reminder of the magic and spirit of the Christmas season.


Closure
Thus, we hope this article has provided valuable insights into How to Draw a Christmas Pear Tree for 2024: A Step-by-Step Guide. We hope you find this article informative and beneficial. See you in our next article!